Today is my first time at blogging and I thought I'd show you how I made a card using peg stamps (Tapestry Stamping as it's sometimes called).

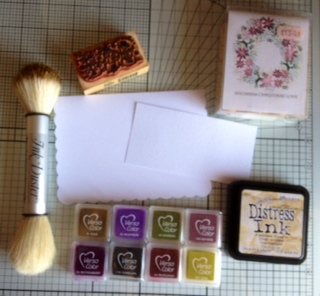
Wooden Stamp - Christmas Is On It's Way
SHO20014 Christmas Love Tapestry Stamp Set
SplodgeAway Mat
Ink duster
Vera Color Mini ink pads
Boysenberry - Large Flower (1st and 2nd and 3rd Generation Stamping)
Heliotrape - Small Flower (1st and 2nd Generation Stamping)
Burgandy - Flower Swirl
Bamboo - Present
Sage - Snowflakes
Gold - Reindeer
Charcoal - (used to stamp the Snowman)
Ink Duster or Make Up Sponge
Distress Ink Pad
Antique Linen
Card C6
Piece of Card 6 cms x 7.5 cms
Gold Mirror card
I added ink to the edges of the cards using a SplodgeAway mat, Ink Duster and the Antique Linen Ink Pad.
Next I stamped the Snowman using the Charcoal ink. Blot the card to make sure the ink is dry.

Now Starting with the Large Flower I Stamped around the edges of both card 3 times without reloading the ink.
 I stamped some images off the page and some inside the card.
Continue With all the stamps in this way ensuring you stamp both inside and off the card and at different areas too.

Now you should have something like this

I hope you like this quick tutorial - Thank You for looking
Chris